
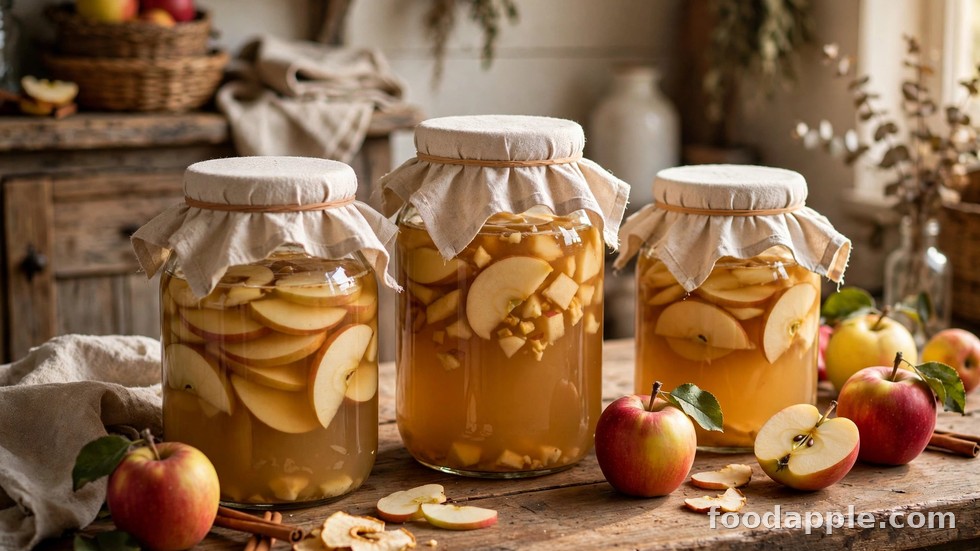
Store-bought apple cider vinegar is convenient, but nothing beats the satisfaction — or the flavor — of making your own. Homemade raw ACV is unpasteurized, full of live cultures, and costs a fraction of premium brands. All it really takes is apples, water, sugar, patience, and a little know-how.
This complete guide walks you through making raw apple cider vinegar from scratch: the equipment you need, the step-by-step fermentation process, how to tell when each stage is done, troubleshooting common problems, and how to bottle and store your finished vinegar. No experience required.
Table of Contents
- What You Need: Ingredients and Equipment
- Step-by-Step: Making ACV from Scratch
- How to Know Fermentation Is Working
- Troubleshooting Common Problems
- Straining, Bottling, and Storing
- How Long Does Homemade ACV Last?
- Frequently Asked Questions
What You Need: Ingredients and Equipment
Homemade vinegar is beautifully simple. You likely own most of the equipment already.
Ingredients
- Apples: 4–5 medium apples, or a large bowl of apple scraps (cores and peels work great — a good use for leftovers)
- Sugar: 2–4 tablespoons of plain white or raw sugar per quart of water — this feeds the yeast in stage one
- Water: Filtered or dechlorinated water (chlorine can inhibit fermentation; let tap water sit uncovered for 24 hours to off-gas)
- Starter (optional but helpful): 2 tablespoons of raw, unfiltered ACV with the mother to kickstart the acetic fermentation
Equipment
- A wide-mouth glass jar (1–2 quart mason jar works perfectly)
- Cheesecloth or a clean cloth plus a rubber band (the ferment needs airflow, not an airtight seal)
- A wooden spoon for stirring
- Cheesecloth or fine strainer for the final straining
- Clean glass bottles with caps for storage
Use organic apples if possible, since you will be fermenting the peels where pesticide residues concentrate. Wash everything thoroughly — but skip the antibacterial soap, which can harm your fermenting microbes.
Step-by-Step: Making ACV from Scratch
Stage 1: Alcoholic Fermentation (Weeks 1–2)
- Step 1: Chop the apples (or gather your scraps) into roughly 1-inch pieces and fill your jar about three-quarters full.
- Step 2: Dissolve 2–4 tablespoons of sugar per quart of water, then pour over the apples until they are fully submerged. Leave 2 inches of headspace.
- Step 3: If using a starter, stir in 2 tablespoons of raw ACV now.
- Step 4: Cover with cheesecloth secured by a rubber band and place in a dark spot at room temperature (around 20–27°C / 68–80°F).
- Step 5: Stir once daily with a wooden spoon, pushing the apples below the surface. This prevents mold and keeps fermentation even.
Stage 2: Acetic Fermentation (Weeks 3–6+)
- Step 6: After 1–2 weeks, strain out the apple pieces. The liquid should smell lightly alcoholic — you have made hard cider.
- Step 7: Return the liquid to the jar, re-cover with cheesecloth, and leave it undisturbed in the dark. The acetic acid bacteria now convert alcohol into vinegar.
- Step 8: Taste weekly after week 3. When it tastes sharply vinegary with no sweetness and has that classic ACV tang, it is ready — usually 4–6 weeks total, sometimes longer in cool rooms.
How to Know Fermentation Is Working
First-time fermenters worry constantly. Here are the good signs that everything is on track:
- Bubbling or fizzing in the first week — yeast is actively converting sugar to alcohol
- A sweet, then alcoholic, then vinegary smell progression over the weeks
- Cloudiness developing in the liquid — bacteria at work
- A thin gelatinous film or blob forming on the surface — congratulations, that is your mother developing
- Apples sinking as their sugars are consumed
Patience is the main ingredient. A cool kitchen slows everything down; warmth speeds it up. Do not rush the acetic stage — under-fermented vinegar tastes weak and sweet rather than sharp.
Troubleshooting Common Problems
Fuzzy mold on the apples
White film or kahm yeast on the surface is usually harmless — skim it off. But fuzzy green, black, or pink mold means contamination. Toss the batch, sterilize the jar, and start over. Daily stirring and keeping apples submerged prevents this.
It smells like nail polish remover
A harsh acetone smell in stage one usually means the ferment needs more oxygen — stir more vigorously and make sure the cloth cover breathes. It often resolves on its own as fermentation balances.
It tastes weak after 6 weeks
Give it more time, especially in cool weather. You can also add a splash of raw ACV as a starter to boost the acetic bacteria population. Homemade vinegar rarely hits the exact 5% acidity of commercial brands, and that is fine.
Fruit flies
Fermenting fruit attracts them relentlessly. Use a tight-weave cloth and a snug rubber band — no gaps. A small dish of vinegar with a drop of dish soap nearby traps the strays.
Straining, Bottling, and Storing
Once your vinegar tastes properly sharp, it is bottling time:
- Strain the liquid through cheesecloth or a coffee filter into a clean bowl
- If a mother formed, save it in a little vinegar in a separate jar — it is your starter for the next batch
- Funnel into clean glass bottles and cap tightly
- Label with the date — you will thank yourself later
- Store in a cool, dark pantry; refrigeration is not needed
Your vinegar will continue to mellow and develop complexity for weeks after bottling. Many home brewers find batch two tastes noticeably better than batch one.
How Long Does Homemade ACV Last?
Practically indefinitely. Vinegar’s acidity makes it self-preserving — harmful bacteria cannot survive in it. Your homemade ACV will keep for years at room temperature.
Over time you may notice the mother regrowing in the bottle, sediment settling, or the flavor deepening. All normal. If it ever smells rotten rather than vinegary (extremely rare), discard it — but in normal conditions, your homemade ACV will outlast your patience for it.
Frequently Asked Questions
Can I make ACV without sugar?
Sugar is needed to feed the yeast in stage one, but the yeast consumes almost all of it — very little remains in the finished vinegar. If you use very sweet apples, you can reduce the added sugar, but skipping it entirely risks a weak or stalled ferment.
Do I need a mother starter to begin?
No, but it helps. Wild yeasts and bacteria on apple skins can start fermentation on their own — that is how vinegar was made for centuries. A splash of raw ACV simply makes the process faster and more reliable.
Why is my homemade ACV cloudy?
Cloudiness is exactly what you want — it means live bacteria and developing mother. Commercial clear vinegar is filtered and pasteurized. Your cloudy homemade version is closer to premium raw ACV.
Can I use apple juice instead of whole apples?
Yes. Use 100% pure apple juice with no preservatives (preservatives kill the fermenting microbes). The process is the same — sugar, cloth cover, patience — and it is actually simpler since there is nothing to strain out in stage one.